


Does pain start in your lower back, travel through your buttock, and sometimes shoot down your leg? A gentle hip stretch may help, but choosing the right movement matters more than stretching harder.
The Figure-4 stretch is a simple way to target tight muscles in your buttocks and outer hips. It may improve comfort and movement, especially when these muscles contribute to your symptoms. However, it cannot fix every cause of sciatica or remove pressure from a compressed spinal nerve.
There is also an important difference between sciatica and psoas tightness. The Figure-4 mainly stretches the glutes and deep hip rotators. The psoas muscles sit at the front of your hips and need different movements.
This guide explains how to perform the Figure-4 safely, modify it using a chair or stretching strap, and add gentle hip-flexor exercises. You’ll also learn when stretching may make symptoms worse and when to seek professional care.
Key Takeaways
- The Figure-4 targets the buttocks and deep hip muscles. It may ease muscle-related discomfort but does not directly stretch the psoas.
- Sciatica has several possible causes. A herniated disk, spinal narrowing, or irritation near the piriformis muscle can contribute to symptoms.
- Start with gentle 15–30-second holds. Never force a stretch or continue when pain, tingling, or numbness increases.
- Chair and strap modifications can make stretching easier. You do not need to reach a deep position to benefit.
- Use separate hip-front stretches for psoas tightness. Gentle strengthening and regular movement also matter.
- Seek medical attention for worsening neurological symptoms. Sudden weakness or bowel and bladder changes require urgent assessment.
Helpful Products at a Glance
For easier reaching during floor stretches: The Trideer Stretching Strap with Loops offers several hand positions when holding your thigh directly feels difficult. It is an optional stretching aid, not a device that treats sciatica.
For extra hand support during gentle yoga modifications: The Trideer Yoga Blocks 2 Pack provides lightweight foam supports for supported stretching positions. They are not intended to support your full body weight like a chair.
Understand Sciatica and Psoas Tightness Before Stretching
Knowing where your pain comes from can help you understand why one stretch feels comfortable while another makes symptoms worse.
What causes sciatic nerve pain?
The sciatic nerve is the body’s largest nerve. It forms from nerve roots in the lower spine, travels through the buttocks, and continues down each leg.
Sciatica happens when part of this nerve pathway becomes irritated or compressed. Symptoms may include burning pain, shooting sensations, tingling, numbness, or weakness.
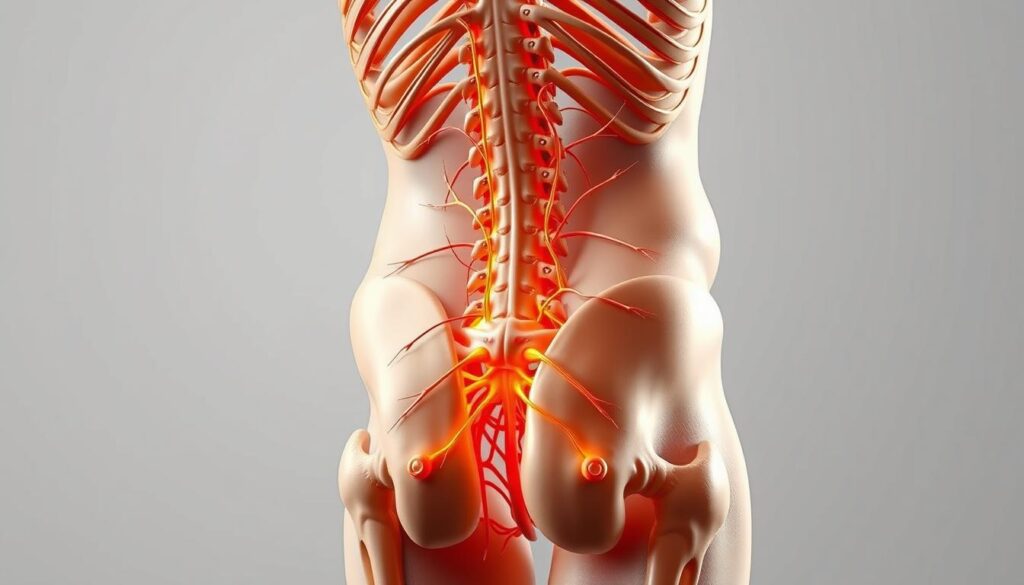
Common causes include:
- Herniated disk: A spinal disk presses against or irritates a nearby nerve root.
- Spinal stenosis: Narrowing around spinal nerves may cause leg symptoms, sometimes worsening during standing or walking.
- Piriformis-related irritation: A deep buttock muscle may irritate the nearby sciatic nerve in some people.
- Muscle or mechanical strain: Pain from the lower back or hip muscles can resemble sciatica without necessarily involving nerve compression.
The Mayo Clinic’s overview of sciatica explains why the underlying cause matters when choosing treatment.
What does the psoas muscle do?
The psoas is a deep hip-flexor muscle that helps lift your thigh and connects movement between your spine, pelvis, and legs.
Long periods of sitting, changes in activity, or reduced hip mobility may leave the front of your hips feeling stiff. However, feeling tight does not always mean a muscle is physically shortened.
The key difference: A Figure-4 stretch focuses on the buttocks and outer hip. A half-kneeling lunge or supported bed-edge stretch targets the front of the hip, including the hip-flexor area.
How can you tell the difference?
| Possible issue | Typical symptoms | Useful clue |
|---|---|---|
| Sciatica | Shooting pain, tingling, or numbness down a leg | Symptoms may reach the calf or foot |
| Piriformis-related pain | Deep buttock discomfort, sometimes extending down the leg | Sitting or certain hip positions may aggravate symptoms |
| Hip-flexor tightness | Stiffness or discomfort at the front of the hip | Hip extension may feel restricted |
| Mechanical lower-back strain | More localized back or hip discomfort | Pain changes with movement or position |
These patterns can overlap, so they cannot confirm a diagnosis. Persistent or worsening symptoms deserve a professional assessment.
Safety First: How to Stretch Without Making Sciatica Worse
Stretching should feel controlled, not like a test of how much discomfort you can tolerate.
According to Harvard Health Publishing, gentle movement may help some people manage sciatica, but stretching that worsens symptoms should be stopped.
Follow these five safety rules
- Start small. Test the position gently before pulling your legs closer.
- Hold for 15–30 seconds. Use shorter holds when first learning the movement.
- Keep breathing. Breathe slowly without holding your breath or forcing yourself deeper.
- Avoid bouncing or pulling. Smooth movement gives you better control over how much tension you feel.
- Stop if nerve symptoms increase. New shooting pain, spreading tingling, numbness, or weakness means the movement is not appropriate to continue.
Keep your back comfortably supported instead of forcing it completely flat. A gentle abdominal contraction can help you control the position, but you should still be able to breathe normally.
Remember: A mild stretching sensation in the buttock can be normal. Sharp pain or symptoms traveling farther down the leg are reasons to stop and reassess.
How to Do the Figure-4 Stretch for Sciatica
The lying Figure-4, sometimes called a reclining pigeon stretch, is the main movement in this routine.
It stretches the gluteal muscles and deep hip rotators, including the piriformis region. For some people, reducing muscle tension in this area may improve comfort.
Step 1: Get into the starting position
Lie on your back on a firm but comfortable surface, such as an exercise mat or a supportive bed.
- Bend both knees.
- Keep both feet flat on the surface.
- Relax your shoulders and neck.
- Let your lower back rest in a comfortable position.
Step 2: Make the Figure-4 shape
Lift your right foot and place your right ankle across your left thigh, just above the knee. Your legs should form a shape similar to the number four.
Allow your right knee to move outward naturally. Do not push it toward the floor or twist the knee joint.
Step 3: Gently draw the legs toward your chest
- Reach both hands behind your left thigh.
- Slowly lift your left foot from the surface.
- Bring your left thigh toward your chest until you feel a gentle stretch in your right buttock.
- Keep your head, neck, and shoulders relaxed.
- Stop increasing the pull when you reach a comfortable limit.
You may not need to lift the left foot very far. Keeping it on the floor can be enough for some beginners.
Step 4: Hold and breathe
Hold for approximately 20–30 seconds if comfortable. Breathe naturally and avoid forcing your knee outward.
If the stretch feels too strong, bring the legs slightly farther away from your chest.
Step 5: Switch sides
Release slowly, place both feet down, and repeat with your left ankle over your right thigh.
Start with one or two gentle holds per side. You can increase gradually if the movement remains comfortable and does not worsen symptoms afterward.
You can also find related movement examples in this medically reviewed guide to sciatica stretches.
Figure-4 Modifications: Chair and Stretching Strap Options
Not everyone can comfortably get down onto the floor or reach behind their thigh. These modifications let you change the position without forcing the movement.
Option 1: Seated Figure-4 stretch
A chair-supported version is useful when getting up from the floor is difficult.
- Sit on a stable chair with both feet on the ground.
- Place your right ankle over your left thigh.
- Sit upright with your shoulders relaxed.
- Lean forward slightly from your hips while keeping your back comfortable.
- Stop when you feel a gentle stretch in your right buttock.
- Hold for 15–30 seconds, then switch sides.
Do not press down on the crossed knee. If the position causes knee or hip pain, stop rather than forcing the leg into place.
Option 2: Strap-assisted Figure-4 stretch
Reaching behind your thigh may be uncomfortable if your shoulders feel stiff or your arms cannot comfortably reach.
A non-elastic stretching strap can help you hold the position without reaching as far.

Start in the same lying Figure-4 position. Pass the strap behind the thigh of the supporting leg, hold its ends or loops, and gently guide the thigh toward your body.
Keep the strap behind your thigh rather than pulling directly on the knee. The goal is easier positioning, not a stronger stretch.
A practical option is the Trideer Stretching Strap with Loops. Its non-elastic design and multiple loops offer different gripping positions. This can be useful for reaching the supporting thigh, but it does not make a painful stretch safer or replace proper technique.
If you already have a suitable stretching strap, there is no need to buy another. You can also perform a smaller Figure-4 movement without lifting your supporting foot.
Choose whichever variation allows you to maintain gentle tension without worsening your leg symptoms.
Complementary Stretches for Glutes, Hamstrings, and Hip Mobility
The Figure-4 is not the only movement that may help with hip stiffness. Other exercises can address nearby muscles, although not everyone with sciatica will tolerate every position.
1. Knee-to-opposite-shoulder stretch
This movement focuses on the buttocks and deep hip muscles.
- Lie on your back with both legs comfortable.
- Bend your right knee and hold around the thigh or shin.
- Gently guide the knee toward your left shoulder.
- Keep your pelvis from twisting excessively.
- Hold for 15–30 seconds if comfortable, then change sides.
Start with one or two repetitions. Skip this exercise if bringing the knee across your body increases back pain or leg symptoms.
2. Standing hamstring stretch
Tight-feeling hamstrings may make everyday bending uncomfortable. Gentle stretching can help improve flexibility, but aggressive hamstring stretches may also aggravate sensitive nerves.
- Stand facing a low, stable step.
- Rest one heel on the step.
- Keep a small bend in your knee.
- Hinge forward slightly from your hips without rounding aggressively.
- Hold for up to 20–30 seconds and switch legs.
For a scissor-style version, keep both feet on the floor in a staggered stance and hinge gently toward the front leg for 5–10 seconds. Repeat 3–5 times if comfortable.
If either movement creates pulling, burning, or tingling down your leg, stop. Nerve symptoms should not be treated as ordinary muscle tightness.
3. Gentle seated spinal rotation
Sit upright on a stable chair with both feet on the floor. Slowly turn your upper body a small amount to one side without forcing the lower back.
Pause briefly, return to the center, and repeat in the other direction. Avoid deep twisting if rotation increases your symptoms or your clinician has advised against it.
4. Supported forward pigeon stretch
Forward pigeon is a deeper hip-opening position. It is optional and generally better suited to people who already tolerate the lying Figure-4 comfortably.
- Begin on your hands and knees.
- Bring one knee forward and position the lower leg comfortably across the front of your body.
- Extend the opposite leg behind you.
- Keep your hips supported rather than forcing them toward the floor.
- Rest your hands on stable supports if needed.
- Hold briefly only if your knees, hips, and back remain comfortable.
If you struggle to reach the floor, yoga blocks can raise the surface under your hands. They may reduce how far you have to bend forward, but they cannot correct an uncomfortable hip or knee position.
The Trideer Yoga Blocks 2 Pack offers two foam blocks with non-slip surfaces and beveled edges. They can provide adjustable-height hand support for gentle yoga positions. Use them on a stable surface, and avoid relying on them as full-weight supports for transfers or getting up.
A firm cushion may also work for supporting your hips during a modified position. You do not need yoga equipment to begin gentle stretching.
If forward pigeon feels too intense, return to the seated or lying Figure-4 instead. There is no benefit to forcing a more advanced pose when an easier version already provides a comfortable stretch.
How to Stretch the Psoas and Front of Your Hips
The Figure-4 does not directly target the psoas. To address stiffness at the front of the hip, try a gentle hip-flexor stretch instead.
1. Bed-edge hip-flexor stretch
This supported movement can be comfortable for people who find kneeling difficult.
- Lie on your back on a firm, stable bed with your hips near the edge.
- Hold one knee gently toward your chest.
- Allow your opposite thigh and leg to lower slightly over the edge.
- Keep your lower back comfortable without arching excessively.
- Hold for approximately 15–30 seconds, then switch sides.
You should feel a mild stretch at the front of the lowered hip or thigh. Make sure your body remains securely supported on the bed, and avoid this variation if you cannot maintain a stable position.
2. Half-kneeling hip-flexor stretch
This exercise targets the front of the hip more directly than the Figure-4.
- Kneel on your right knee with your left foot in front.
- Keep your upper body upright.
- Gently tighten your right buttock and tuck your pelvis slightly.
- Shift forward a small amount without arching your lower back.
- Stop when you feel a comfortable stretch at the front of your right hip.
- Hold for 20–30 seconds, then change sides.
A folded towel or cushion can reduce pressure on the kneeling knee. You can also use a standing split-stance variation if kneeling is uncomfortable.
This approach is consistent with NHS physiotherapy guidance for the half-kneeling hip stretch.
3. Add gentle strengthening
Stretching alone may not address every reason your hips feel stiff. Weakness, limited movement, or reduced activity may also contribute.
Two simple exercises can complement your routine:
- Standing or seated marching: Slowly lift one knee, lower it, and alternate sides for 8–10 comfortable repetitions.
- Glute bridges: Lie on your back with knees bent, tighten your buttocks, and lift your hips slightly while keeping your back comfortable. Lower slowly and begin with 5–8 repetitions.
You do not need a stability ball to begin. A stable floor or supportive exercise surface is enough for basic bridges.
Combining gentle mobility with appropriate strengthening can help improve how you move, although no single exercise guarantees long-term sciatica relief.
Important Form Cues That Protect Your Knees and Back
Small adjustments can make the difference between a comfortable hip stretch and an irritating movement.
- Keep the crossed ankle supported: Rest it above the opposite knee instead of pressing against the knee joint.
- Avoid forcing knee movement: Let the hip rotate naturally without pushing the knee downward.
- Relax your upper body: Do not lift your head or tense your shoulders during the lying Figure-4.
- Maintain a comfortable spine: Avoid excessive rounding or arching while pulling your legs closer.
- Move within your own range: You do not need to match someone else’s flexibility.
- Monitor symptoms afterward: A stretch that causes a lasting increase in leg pain is not a useful progression.
A useful rule: Change the position to fit your body rather than forcing your body into the position.
A Simple 5-Minute Stretching Routine
If your symptoms are mild, stable, and not aggravated by these movements, you can begin with a short routine instead of attempting every exercise in one session.
| Exercise | Suggested amount |
|---|---|
| Easy walking or gentle marching | 1 minute |
| Lying or seated Figure-4 | 20 seconds per side |
| Knee to opposite shoulder | 15–20 seconds per side |
| Standing or kneeling hip-flexor stretch | 20 seconds per side |
| Gentle glute bridges or marching | About 1 minute |
| Relaxed walking and position changes | Remaining time |
These timings are starting suggestions, not a required prescription. Skip any movement that worsens symptoms and use a comfortable alternative.
You can try the routine once daily and increase gradually if it agrees with your body. Track which movements improve comfort and which cause discomfort later that day.
For broader mobility training beyond this pain-focused routine, explore our guide to flexibility and hyperbolic stretching. More advanced flexibility methods are not automatically suitable for someone experiencing sciatica.
When to See a Healthcare Professional
Sciatica often improves over several weeks, but stretching is not always the right answer.
According to the NHS guidance on sciatica, staying gently active can be helpful. However, persistent pain, worsening symptoms, or difficulty performing everyday activities are reasons to seek medical evaluation.
When should you arrange an appointment?
Contact a healthcare professional if:
- Pain is getting worse or is not improving after a few weeks.
- Symptoms interfere with walking, sleeping, or daily activities.
- You develop persistent or increasing numbness or tingling.
- You notice leg weakness or difficulty controlling normal movements.
- Stretching repeatedly increases your symptoms instead of improving comfort.
New or worsening weakness deserves prompt assessment rather than waiting several weeks.
When is emergency care necessary?
Seek emergency medical care immediately if you experience:
- New difficulty starting urination, inability to urinate, or loss of bladder control.
- Loss of bowel control.
- Numbness around your genitals, buttocks, or inner thighs.
- Severe or worsening weakness or numbness in both legs.
- Sudden significant neurological symptoms, especially after a serious injury.
These symptoms may indicate serious nerve compression that needs urgent treatment. Do not continue stretching while seeking help.
How can a physical therapist help?
A licensed physical therapist can assess movement, strength, flexibility, and symptoms to help determine which exercises fit your condition.
A personalized plan may include:
- Gentle mobility exercises.
- Core and glute strengthening.
- Activity and posture modifications.
- Appropriate nerve-related exercises when indicated.
- Progressive return to everyday activities.
Physical therapy is not simply about increasing flexibility. The goal is to improve function while addressing the likely causes of your symptoms.
Frequently Asked Questions
Does the Figure-4 stretch release the sciatic nerve?
Not directly. It stretches the buttock and hip muscles, which may reduce muscle-related discomfort in some people. It cannot reliably remove pressure from a nerve compressed by a spinal disk or another structural problem.
Can a tight psoas cause sciatica?
Psoas-related discomfort and sciatica can overlap, but they are not the same condition. The psoas can contribute to front-of-hip or lower-back discomfort, while sciatica involves irritation of the sciatic nerve pathway. Tightness alone does not prove the cause of pain.
Should I stretch every day if I have sciatica?
Gentle daily movement may be useful if it does not worsen your symptoms. Start with a small amount and adjust based on your response. Some people need a more individualized exercise plan rather than repeated stretching.
Is the seated Figure-4 as useful as the floor version?
Both versions can stretch the outer hip and buttock muscles. The better option is the one you can perform comfortably, with good control and without increasing nerve symptoms.
What if stretching makes the pain shoot farther down my leg?
Stop the movement. Increasing radiating pain, tingling, or numbness may mean the position is aggravating sensitive nerve tissue. If symptoms persist or worsen, arrange a professional assessment.
Do I need a stretching strap or yoga blocks?
No. These are optional tools for reaching or supporting certain positions. A stable chair, folded cushion, or a smaller movement range may be enough. None of these products treats the underlying cause of sciatica.
Conclusion: Gentle Movement Matters More Than Deep Stretching
The Figure-4 is a practical starting point for improving outer-hip flexibility and easing some types of buttock discomfort. It is not a complete treatment for sciatica, and it does not directly stretch the psoas.
Start with a comfortable lying or seated Figure-4, hold briefly, and breathe naturally. If front-of-hip stiffness is also an issue, add a gentle hip-flexor stretch and basic strengthening movements that you tolerate well.
Your next step is simple: Choose one or two comfortable movements, notice how your symptoms respond, and increase gradually rather than chasing a deeper stretch. If pain persists, spreads, or comes with neurological symptoms, get an assessment so your exercise plan matches the cause.




Don’t Miss These Picks